
Primal Chaos Guide

════════════ 📜 Table of Contents ════════════
📊 Tier List
📈 Quick tier chart to track your advancement.
🔥 Progression Guide
🚀 From humble beginnings to endgame dominance — follow the step-by-step path.
👑 Boss & Special Encounter Reference
⚔️ Strategies, rewards, and unique mechanics for special fights.
💡 FAQ & Player Tips
❓ Common questions, pro tricks, and survival hacks.
🦖 Creature Reference
📚 Complete creature lists organized by tier.
↳ 💻 Spawn Command Index — Find admin commands for summoning every creature/item by tier.
⚠️ Error Reporting & Revisions
🧩 Report inaccuracies or outdated entries.
💡 Quick Navigation
🧭 Use the Outline Panel on the left to jump instantly between sections.
═══════════════ 📊 Tier List ════════════════
🦖 Vanilla
☠️ Toxic (Land) | 🌊 Beta (Water creatures)
⚔️ Alpha
⚡ Electric | 🔥 Volcanic | 💧 Hydro
🌑 Shadow | 🧚 Fairy
🦄 Mythic | 🐺 Fabled | 🐉 Legendary
😇 Angelic | 😈 Demonic
🧬 Origin
🌪️ Spirit | 💀 Chaos
😱 Nightmare
═════════════ Progression Guide ═════════════
🛡️Getting Started — Establishing Your Foothold
Survive long enough to establish a safe location — whether it’s a raft base or a small land outpost tucked away from danger.
🏗️ Early Essentials to Craft (Crafted in inventory)
Primal Forge – for smelting modded ores and materials
Primal Smithy – for crafting weapons, armor, and survival tools
⚠️ Avoid glowing-eyed creatures early on — they usually belong to higher tiers and will demolish you if provoked.
🥚 Build Your Food & Egg Supply
Before taming your first modded creatures, you’ll need a steady supply of vanilla crops and eggs.
🌱 Crops to Grow:
Rockarrot
Savoroot
Citronal
Longrass
🐣 Egg Layers to Tame:
Dodos
Dilos
Other common early-game passive layers
📌 Tip: See the FAQ section for optimizing egg production.
☣️ Toxic Beginnings — From Toxic to Alpha
Your first real power spike comes from Toxic-tier creatures. These tames are the gateway to stronger knockout tools and your next tier of progression.
🧪 How to Tame Toxic Creatures
Use basic Tranq Arrows or a bow
Feed them Toxic Kibble after knockout
💉 Why Tame Toxic Creatures?
Excellent early resource gathering and mobility
Toxic Blood is essential for crafting Potent Tranq Arrows — the next step in your knockout progression
📌 Pro Tip: Kill a few extra Toxic creatures to stockpile Toxic Blood for crafting.
🥚 Crafting Alpha Kibble
Once you have Toxic creatures breeding, it’s time to prepare for Alpha-tier taming.
Alpha Kibble Recipe:
Requires unfertilized Toxic Eggs
Combine with other vanilla ingredients in the Primal Cauldron
Best Early Breeders:
Toxic Dodos
Toxic Dilos
Toxic Parasaurs
📌 Pro Tip: Keep multiple females with one male in a fenced pen for constant egg production. An Egg Collector makes this step far easier.
🦖 Alpha Ascent — Forged in Strength
With Alpha Kibble in hand, it’s time to upgrade your tames and set up for the Elemental tier.
🎯 How to Tame Alpha Creatures
Knock out Alpha-tier dinos using Potent Tranqs or better
Feed them Alpha Kibble to tame
💉 Why Kill Some?
Defeating Alphas drops Alpha Blood — essential for crafting stronger tranqs like Alpha Arrows and Alpha Bullets
📌 Tip: Focus on utility creatures first — harvesters, tanks, and strong early fighters will help you through the next stage.
🌱 Crafting Elemental Kibble
Once Alpha creatures are breeding, start preparing for Elemental-tier taming.
Elemental Kibble Recipe:
Requires unfertilized Alpha Eggs
Combine with other standard resources in the Primal Cauldron
Start Your Breeding Lines:
Raise breeders for each element — you’ll need a steady egg supply as you progress:
Hydro
Volcanic
Electric
📌 Tip: These elemental eggs are critical for taming in the mid-game and are your gateway to specialized power creatures.
⚡🔥🌊 Elemental Dominion — Masters of the Elements
With Elemental Kibble ready, it’s time to build your elemental army and push into the first real boss fights of Primal Chaos.
🦖 Tame Elemental Creatures
Each Elemental type brings unique mechanics:
🌊 Hydro – Gains buffs near water, suffocates enemy riders and dinos in close range
🔥 Volcanic – Applies the Enflamed debuff, dealing burn damage over time; great for sustained DPS
⚡ Electric – Moves quickly and can stun targets; excellent for mobility and crowd control
📌 Tip: Aim to tame at least one of each type to prepare for bosses and counter a variety of threats.
🧪 Defeat Elemental Bosses
The first major boss fights of Primal Chaos are here.
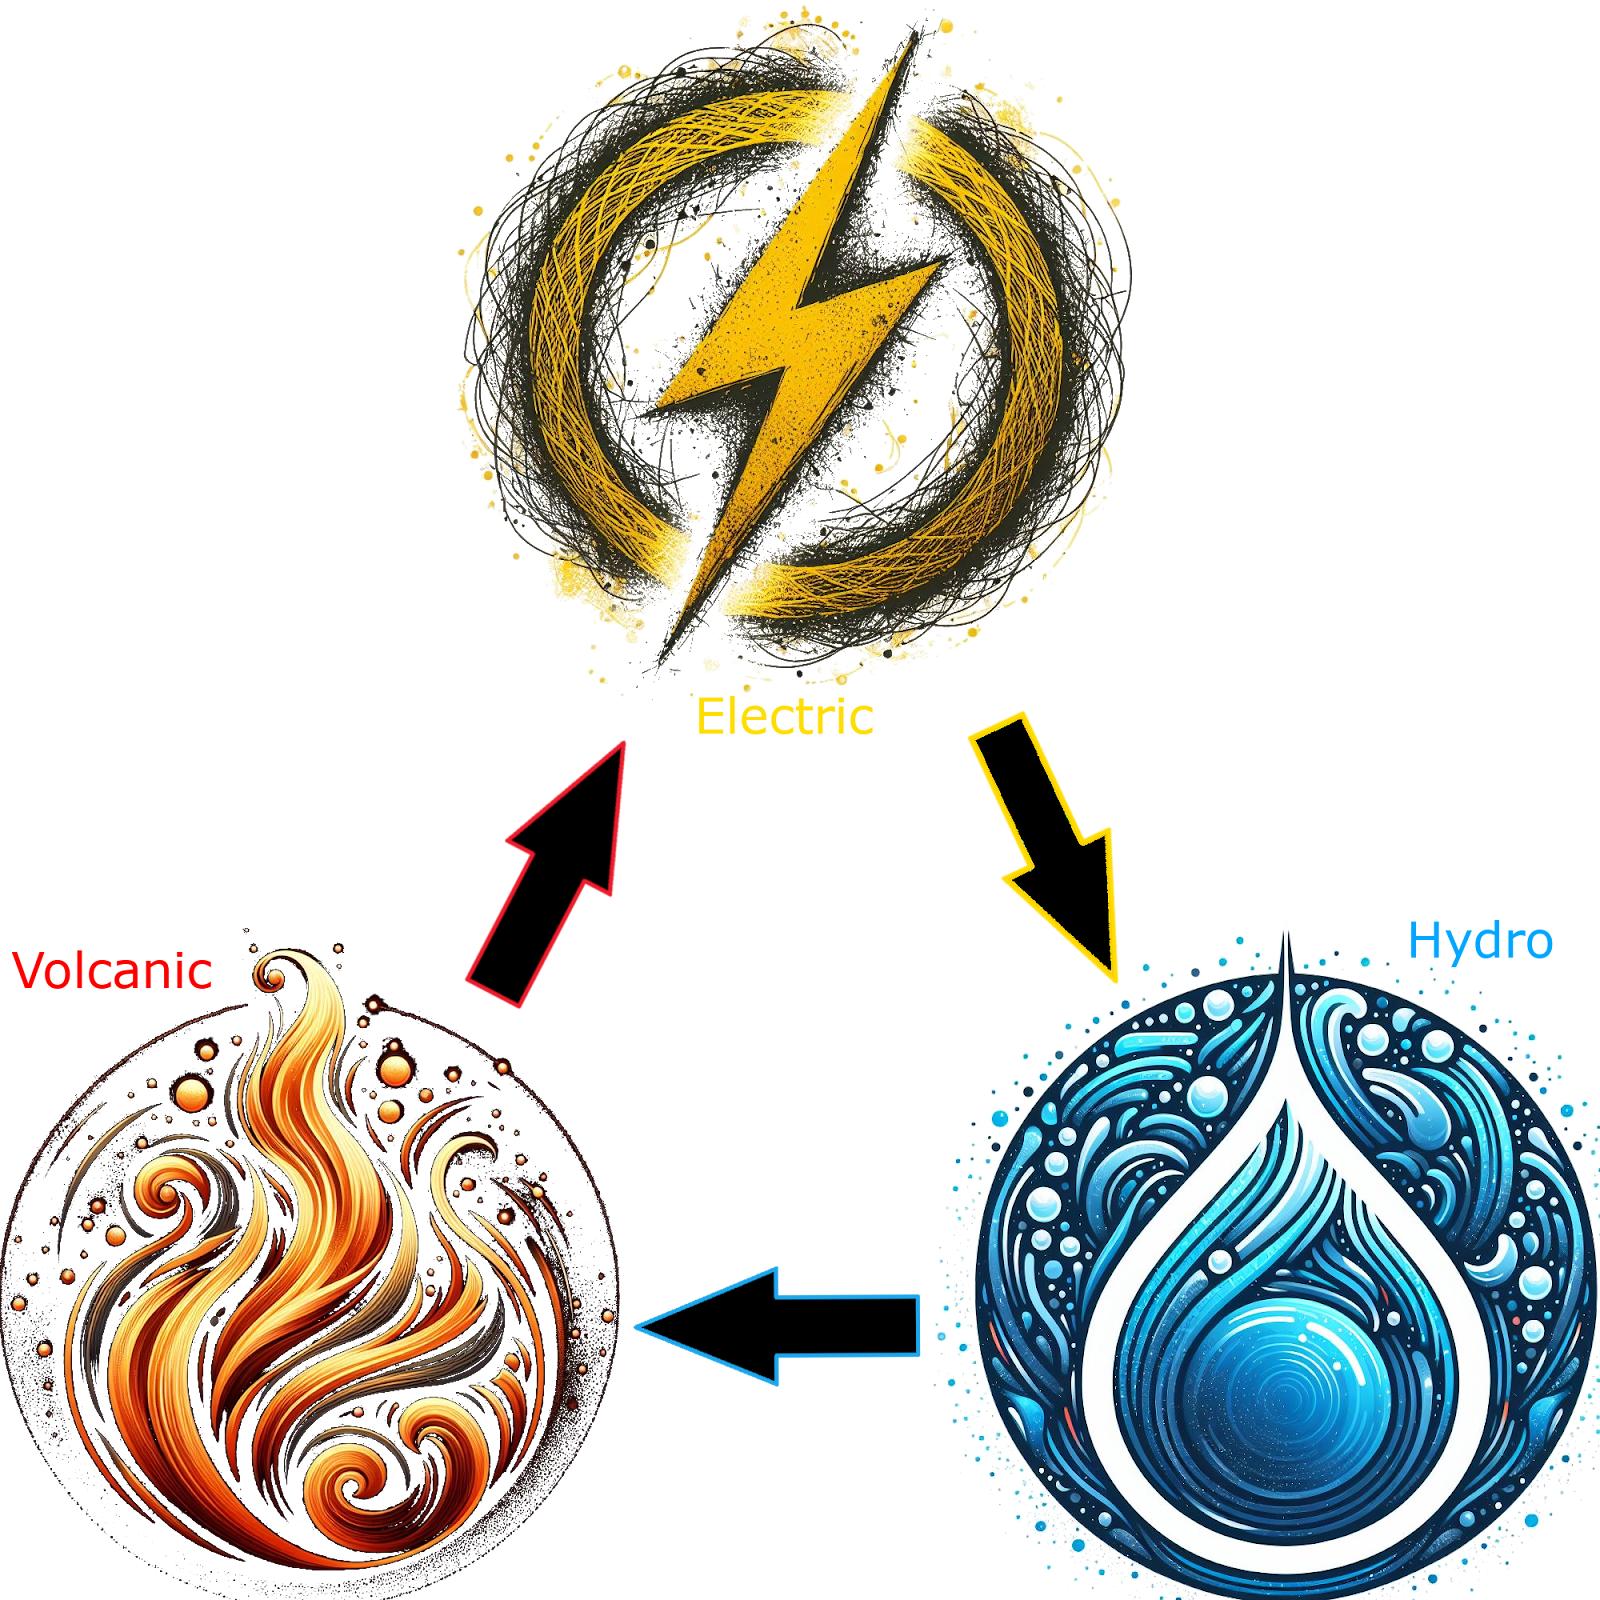
🌀 Elemental Strength Chart:
Hydro ➜ Volcanic ➜ Electric ➜ Hydro
Use this triangle to pick the best counter-element for each fight.
🗡️ Rules of Engagement:
❌ No fliers — they will be grounded on attack
Summon bosses using Elemental Scrolls at the Primal Smithy or find them roaming the wild
🎁 Boss Drops:
Elemental Seeds – Used to grow rare crops
Tameable Tokens – 20% drop chance, but at least one guaranteed
Elemental Saddles – Found only from Elemental Bosses
📌 Tip: Bring multiple tames, healing potions, and be ready for sustained fights — these bosses are your gateway to high-tier creatures.
🌱 Grow Elemental Crops & Craft Shadow/Fairy Kibble
Your next step begins in the garden.
🧬 Plant the Seeds – Use Elemental Seeds dropped by bosses in crop plots
🍇 Harvest & Craft – Use harvested Elemental Fruits to craft both Shadow and Fairy Kibble
📌 Tip: These kibble tiers unlock advanced utility tames and improved breeders — don’t skip them.
🧚🌑 Shadow & Fairy Ascension — Path to Mythic, Fabled & Legendary
The Shadow and Fairy tiers mark your entry into a more tactical stage of progression. Both are essential for unlocking the next three kibble tiers.
🧚 Fairy Creatures
Strong lifesteal and regeneration abilities
Excellent for sustained fights and team support
🕶️ Shadow Creatures
Passive reflect ability bounces damage back at attackers
Excellent against hard-hitting enemies
📌 Tip: Tame both types to ensure steady egg production for advanced kibble tiers.
🥚 Crafting Mythic, Fabled & Legendary Kibble
Once your Shadow and Fairy breeders are producing eggs, you can craft the next three kibble tiers:
🔸 Mythic Kibble
🔹 Fabled Kibble
🌟 Legendary Kibble
These kibbles are vital for taming higher-tier creatures and pushing into mid-to-late game progression.
📌 Tip: Keep your egg farms well-maintained and running efficiently to avoid bottlenecks.
🦄🐺🐉 Mythic, Fabled, and Legendary Conquest
You’ve entered the mid-game trifecta — three powerful sub-tiers that share the same level but offer different specialties. These creatures will be your foundation for preparing to face the Demonic and Angelic tiers.
🟣 Mythic
Excellent gatherers
3× harvest bonus on most resources
🔶 Legendary
Combat-focused
Stacking kills, natural regen, bleed, and rider protection
🔵 Fabled
Utility-oriented
High base weight — ideal for hauling and crafting support
📌 Tip: Use these three sub-tiers to fill gaps in your lineup — gatherers, combat specialists, and heavy haulers will all be key for your next tier of progression.
🛠️ Preparing for Demonic & Angelic Progression
The Demonic and Angelic tiers are a major leap forward in both power and utility. Preparing now will make that jump far smoother:
Breed and imprint your best Mythic, Legendary, and Fabled tames for maximum stats
Stockpile resources — Demonic and Angelic progression requires advanced crafting materials
Farm boss tokens & rare drops — essential for summoning higher-tier encounters later
Upgrade saddles — quality gear is critical for surviving Demonic/Angelic fights
Prepare high-tier tranq ammo — these tames require significant torpor to knock out
📌 Tip: A well-prepared Mythic/Legendary/Fabled roster will carry you into Demonic & Angelic fights with confidence, letting you focus on the battles instead of scrambling for resources mid-progress.
⚠️ Deprecated Items
Some items you may see in the Chaos Smithy or older Primal Chaos guides are deprecated, including Primal Polymer, Primal Electronics, and the craftable Demonic Rocket Launcher.
Primal Polymer and Primal Electronics no longer drop from any Primal creatures. If you’re seeing references to them, it’s legacy content from older versions.
The Demonic Rocket Launcher and its ammo still drop from Deathknight, but cannot be crafted, even though an engram still appears in the Chaos Smithy.
Players should ignore the launcher engram entirely — it does not function and will not allow crafting.
😈😇 Demonic and Angelic Dominion
Once you’ve unlocked Demonic and Angelic Kibble, it’s time to tame these two powerful opposites and begin the climb toward the Origin Bosses.
Demonic and Angelic creatures are standard KO tames.
😈 Demonic Creatures
High burst damage
Excellent for aggressive offense and crowd control
😇 Angelic Creatures
Focused on healing, support, and sustain
Often boost nearby allies
📌 Tip: These tames complement each other in battle — one strikes hard, the other keeps your team alive.
📌 See Advanced Power Modes to learn how to activate their full potential.
💥 Hunt Down & Kill Primal Creatures
To advance, you’ll need Primal Blood — a key ingredient for crafting Origin Tokens.
What to Know:
Only true Primal creatures drop Primal Blood
❌ No drops from Tek or Resurrected variants
💀 They hit hard but lack advanced abilities or elemental powers
⚠️ Apply a Grounded Debuff — flying is completely disabled
📌 Tip: Bring strong Demonic, Angelic, or Legendary tames for a safe kill.
🔱 Defeat Origin Creatures
Slaying Origin creatures grants the Origin Tokens needed to summon Demonic and Angelic bosses. Origin dinos can be found in the wild or crafted via the Primal Smithy.
Each Origin Kill Rewards:
🪙 Origin Token
🔧 High-tier materials
⚠️ Combat Warning: These fights are tough — bring fully imprinted, buffed Demonic or Angelic tames with quality saddles and healing potions.
⚔️ Defeat Demonic & Angelic Bosses
Craft boss summons using Origin Tokens from Origin creatures.
🟥 Demonic Boss: Skorvax the Demonking
Chance to drop a Tameable Token on death
Use token to summon a KO-tamable version
🪖 Saddle can be found via the Ascendant Lootboss
🟦 Angelic Boss: (Not tameable. More info coming soon…)
📌 Tip: These bosses are extremely powerful — bring top-tier tames, potions, and buffs to survive.
🐉 Summon & Defeat Draconis (Origin Boss)
The most powerful Origin Boss, Draconis, is summoned with crafted scrolls at the Primal Smithy.
Boss Mechanics:
Activates an invulnerable shield at ~90%, ~50%, and ~10% HP
To break the shield, kill his summoned minions
Tameable Draconis The Original:
Chance to drop a Tameable Token on death
Summon and KO-tame the Tameable version
🧬 Requires an Origin Artifact from Mr. Artifact the Original
🪖 Saddle obtained from the Origin Lootboss
Bonus Drop:
Draconis minions may drop Origin Tameable Tokens to summon tameable Origin creatures
📌 Tip: Dodoreapers take 80% reduced damage unless affected by Charged Light — bring a Glowtail or other charge pet to remove their resistance.
🌪️💀 Spirit and Chaos Reign
The final stretch of Primal Chaos progression brings together the might of Spirit and Chaos creatures, the menace of Nightmares, and the ultimate challenge — the Deathknight.
🌌 Tame Spirit & Chaos Creatures
Defeat the Spirit and Chaos bosses (summoned at the Primal Smithy) to unlock the ability to tame their wild counterparts. Each respectively unlocks their kibble engram.
These are among the strongest creatures in the game.
Build your final boss team around them for the toughest fights ahead.
💀 Hunt Primal Resurrected Creatures
Powerful untamable enemies designed to test endgame strength.
Main Drop: Primal Bones — used to craft Nightmares and Deathknights
Drops also include rare loot and crafting materials
⚠️ Grounded Debuff — fliers disabled
Extremely high damage; bring your best late-game tames
😈 Summon or Hunt Nightmare Bosses
Required for unlocking the Deathknight.
How to Encounter:
Summon using crafted Nightmare Summons (Origin Tokens + Primal Bones)
Rare wild spawns
Drops:
Nightmare Token — required for Deathknight summons
High-end tools, armor, and rare mats
⚠️ Nightmares also apply Grounded Debuff in combat
📌 Pro Tip: Origins can be evolved into Nightmares — see the Taming an Origin section.
🛡️ Summon & Defeat the Deathknight
The final challenge of Primal Chaos progression.
Summon: Crafted using Nightmare Tokens + rare materials
Fight Mechanics:
Heavy resistance to all damage except from Nightmare creatures
Nightmares are key DPS; Angelics in Berserk Mode can soak massive hits
Drops:
DK Armor (high-end gear)
DK Saddle
Demonic Rocket Launcher / Rockets (Novelty Item)
Tameable Token (10% chance)
📌 Pro Tip: Enter this fight with coordination, healing, and max-tier gear — every step of your journey so far leads to this moment.
═══════ Boss & Special Encounter Reference ═══════
🎁 Loot Bosses
Loot Bosses provide progressively better rewards as they evolve through tiers.
Evolution mechanic: Bring a Loot Boss below 10% HP to trigger an upgrade timer. Keep it alive until the timer ends to evolve it into the next tier.
Persistence: A maximum of 6 Loot Bosses can exist on the map at once.
Drops: Only Loot Bosses drop saddles. Drops scale upward — each higher-tier Loot Boss inherits the saddle drop pool of all tiers below it, in addition to its own exclusive rewards.

Loot boss Tiers:
Ramshackle
A maximum of 6 Loot Bosses persist on the map. Only the Ramshackle tier spawns naturally in the wild, and defeating Mesopithecus and Procoptodon encourages new spawns.Apprentice
Journeyman
Mastercraft
Ascendant
Drops include Demonic and Angelic Saddles
Origin
⚠️ Goes berserk randomly during combat
Drops include Origin Saddles
Nightmare
⚠️ Goes berserk randomly during combat
Drops include Nightmare Saddles
🧍♂️ Mr. Artifact Section
Mr. Artifact the Stronger
Basic version. Drops useful artifacts.
Great early game option for gathering boss requirements.
Found anywhere Megatheriums spawn. Kill megatheriums to encourage spawns.
Max 6 Mr. Artifacts will now persistently exist on the map
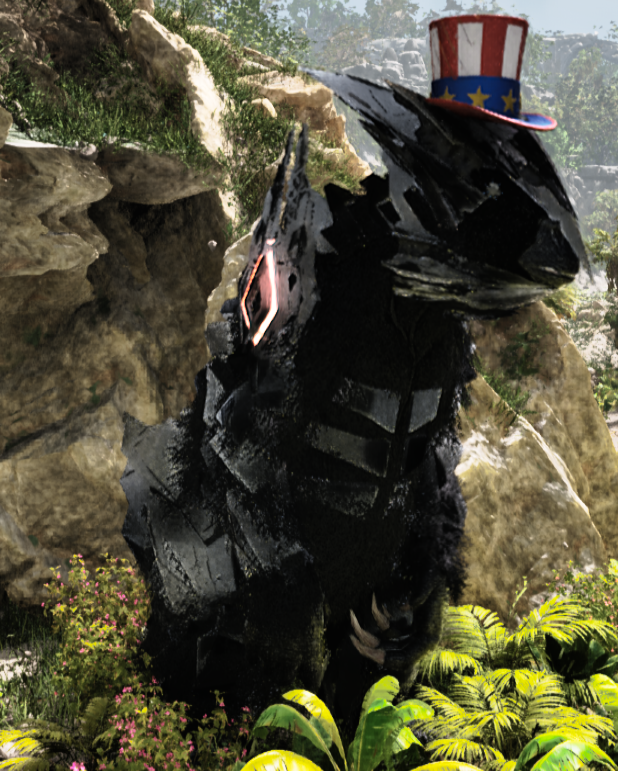
Mr. Artifact the Original
30% chance to spawn when you defeat a regular Mr. Artifact.
Drops more artifacts and has a high chance to drop the Origin Artifact blueprint
Warning: Has punishing attacks — requires careful dodging and observation
Origin Artifact is used to tame Origins
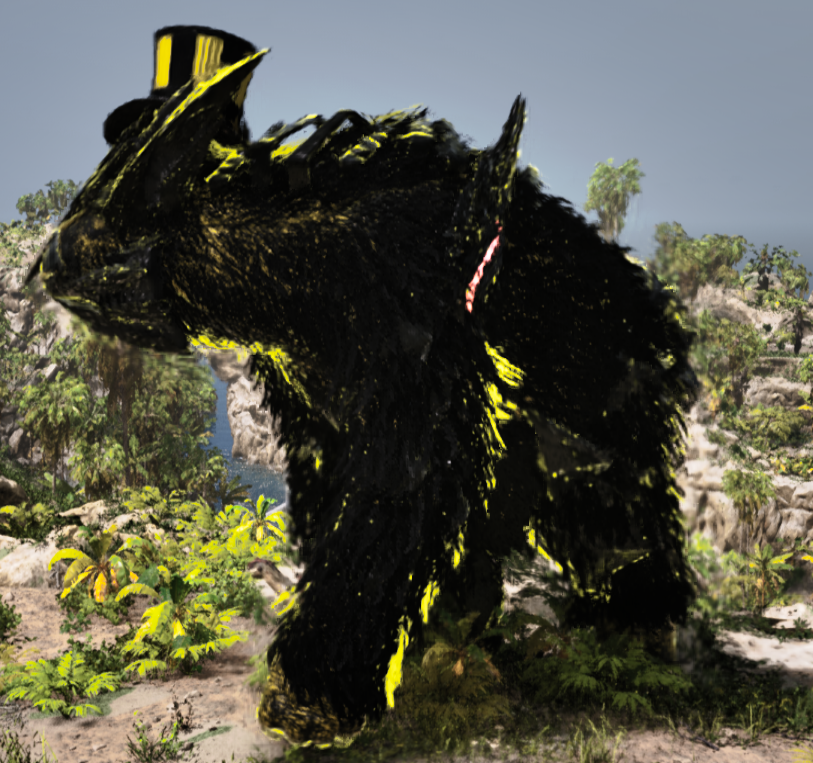
🧬 How to Tame an Origin and Evolve to a Nightmare
- Tameable Origins can only be summoned using Tameable Tokens, dropped by Draconis minions (50% chance).
- They must be weakened to 20% health before torpor will affect them.
- ⚠️ They heal quickly — keep them below 20% until fully knocked out.
- Once tamed, they offer 30% resistance and 10% healing to themselves, and 10% resistance + 5% healing to allies.
- Requires an Origin Artifact to summon — dropped by Mr. Artifact the Original.
- Can evolve into Nightmare creatures later in inventory recipe. This requires additional end-game materials.
Open your Origin’s inventory.
Craft the Nightmare Evolution item (Engram: Nightmare [Dino] Evolution) inside the Origin’s inventory to begin the transformation.
Requires rare endgame materials, including:
Angelic Soul ×5
Demonic Soul ×5
Nightmare Token ×1
Origin Token ×1
Primal Blood ×300
Primal Soul ×1
Tameable Origin Summon ×1
Chaos Kibble ×1
Fabled Blood ×500
Origin Blood ×5
Origin Soul ×1
Primal Bones ×100
Spirit Kibble ×1
(Exact ingredients may vary by dino type.)
⚠️ Your Origin will lose its resistance and healing passives, but gain even greater power as a Nightmare!
⚡ Advanced Power Modes: Demonic & Angelic ⚡
Certain high-tier creatures now have access to Powerup Modes (Berserk Mode) that give huge bonuses in battle!
---
😈 Demonic Berserk Mode
Activated manually on all Demonic creatures.
Effects:
• Boosts Speed
• Boosts Torpor Output
• Boosts Damage
• Boosts AOE Damage
• Visual Upgrade 🔥
• Sets nearby enemies on fire
⚠️ Wild Demonics:
Wild demonics auto-activate Berserk Mode below 40% health, doubling their torpor and making them much harder to tame.
---
👼 Angelic Berserk Mode
Activated manually on all Angelic creatures.
Effects:
• Boosts Speed
• Boosts Torpor Output
• Boosts Health Regen
• Boosts Max Health
• Visual Upgrade ✨
• Activates Allied Damage Absorption
🛡️ Angelic Shield (Unique Ability):
• Redirects ALL incoming damage from nearby tames to the Angelic
• Great for protecting boss armies
• Visible shield radius shows area of effect
❗ Does not protect other Angelics
---
🎮 How to Activate (Tamed):
• PC: Press X
• Console: Click Right Thumbstick
Mastering these modes gives you the edge in both offense and defense — perfect for dominating endgame content. 💥
════════════ ❓ FAQ & Player Tips ════════════
Q: How do dinos spawn?
A: Modded creatures "piggyback" from vanilla dino spawns.
For example, a vanilla Argent spawning might result in a Beta Argent or Alpha Argent instead.
Q: How do I get unfertilized eggs for kibble in Primal Chaos?
To consistently farm unfertilized eggs for kibble:
Set layegginterval to 0.3 in your GAME INI.
Ensure your dinos are mate boosted (at least 1 male and multiple females).
Disable mating (this produces unfertilized eggs).
Use an Oviraptor to get an egg-laying boost.
How layegginterval works:
- 1.0 = one chance of an egg every ~17 minutes (or ~11 minutes with an Oviraptor).
- 10.0 = one chance every ~170 minutes.
- 0.1 = one chance every ~1.7 minutes.
📌 **Note:** This setup is essential for reliable kibble production.
Q: Why aren't dinos spawning?
A: Move the mod to 1st/top of mod order, then perform a dino wipe
Q: Can we take modded dinos into boss arenas?
A: If their vanilla counterpart can enter, the modded version also can.
Sidenote: Due to size changes as you go up the tiers, some dinos will become too large to enter the tek cave, like the elemental rexes.
Q: How do we unlock tek engrams or get element?
A: The Primal Chaos mod doesn’t provide any custom way to unlock Tek engrams or generate Element — those systems are left entirely to vanilla Ark mechanics.
Q: How can I find Elemental Titans?
A: Elemental Titans have been removed from the mod indefinitely.
Q: How can I find Omega Dinos?
A: Omega Dinos have been removed from the mod indefinitely.
Armor Sets – Protection, Resistances & Perks
Tool Harvesting Multipliers
The in-game descriptions for Primal Chaos tools are inaccurate.
Here are the correct harvesting multipliers for each tier:
Mythic Tools – ×3 harvesting
Elemental Tools – ×2.5 harvesting
Alpha Tools – ×2 harvesting
Toxic Tools – ×1.5 harvesting
These multipliers apply to all tool types in each tier (pickaxe, hatchet, sickle, etc.).
Tranq Ammo Modifiers
Primal-tier creatures drop Primal Bullets & Compound Arrows
══════ 🧬 Primal Chaos Creature List by Tier ══════
🔰 Toxic & Beta Tier (Shared Tier: Land = Toxic, Water = Beta)
☠️ Toxic (Land)
🌊 Beta (Water creatures)
🦍 Alpha Tier
⚡🌊🌋 Elemental Tier
🧚🕷️Advanced Elemental Tier
👑 Boss Tiers
════════ ⚠️ Error Reporting & Revisions ════════
This guide is updated as new mechanics and discoveries are verified.
If you notice inaccurate details, outdated information, or missing data, please report them through Discord.
Contact: (@Rokitur) on the Primal Chaos Discord for corrections or confirmed findings.
Last reviewed: [25 Nov 2025]
~ Rokitur
Comments
Log in to comment